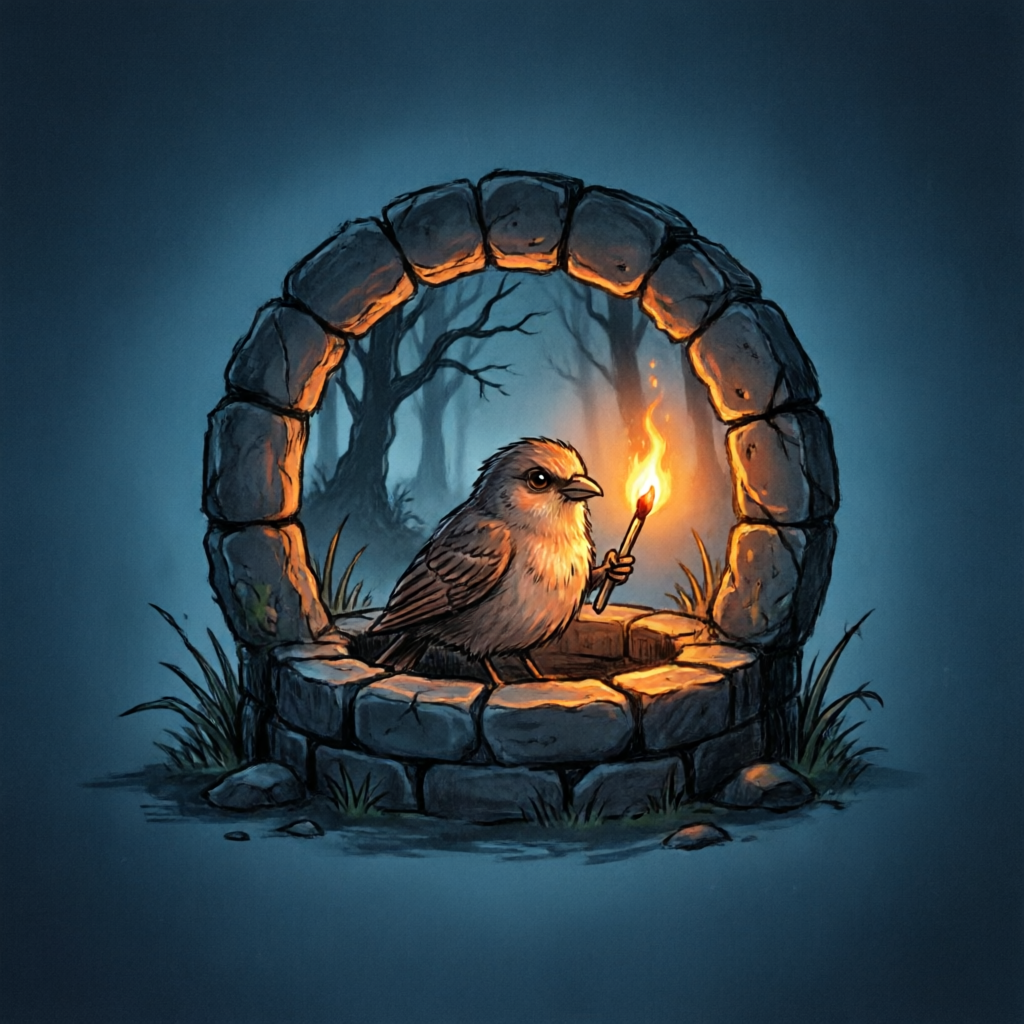
Welldweller Demo Guide: Everything to Know Before Playing the Metroidvania
Dive into our comprehensive Welldweller demo guide to master matchstick combat, explore dark fairy-tale ruins, and discover essential survival tips.
Stepping into the haunting depths of an overgrown subterranean kingdom is both breathtaking and perilous. If you are preparing to fire up the welldweller demo, you will instantly notice how its somber fairy-tale atmosphere sets a distinctly moody tone for modern Metroidvania fans. Getting an early look at this preview build reveals a tight, responsive action-adventure focused on survival, lighting mechanics, and heartfelt storytelling. Whether you are already familiar with the developer's past hits or completely fresh to the genre, testing out the welldweller demo offers the perfect taste of what promises to be one of indie gaming's most memorable journeys.
Developed by the acclaimed creator behind Islets and Crypt Custodian, this adventure centers on Glimmer, an unlikely avian hero facing an insurmountable evil. Deep beneath a dense forest at the bottom of an abandoned stone well, an entire world festers under the rule of an oppressive queen. Armed with little more than a fragile matchstick, Glimmer must strike out against nightmarish monsters, locate stolen family members, and bring light into long-forgotten corridors.
This guide breaks down everything featured in the preview slice, covering core mechanics, key NPCs, combat systems, and strategies to help you conquer every obstacle with ease.
What to Expect in the Welldweller Demo
The preview build gives players a focused look at the opening hours of the campaign. Rather than dropping you into an overwhelming maze without context, the opening sequences balance narrative worldbuilding with tight platforming challenges. You awake in the damp recesses beneath the surface, learning basic aerial mobility, strike timing, and navigation.
From player experience and community reports, the structure closely reflects classic non-linear design. You will encounter sealed gates, elevated ledges just out of reach, and pitch-black chambers that require creative problem-solving. Exploration is rewarded generously; venturing into side paths often reveals hidden caches, lore fragments, or early customization items.
The atmosphere relies heavily on high-contrast lighting. Because Glimmer explores sunken ruins, your field of view is intrinsically tied to your matchstick. As you move through the world, shadows dance across rotted stone, masking lurking predators until you step close enough to illuminate their silhouettes.
| Feature Area | Implementation in the Demo | Player Impact |
|---|---|---|
| Mobility | Responsive jumping, hovering, and short-range dashes | Tight platforming over brambles, spikes, and collapsing stone |
| Visibility | Dynamic light radiating from Glimmer's matchstick | Atmospheric tension; reveals camouflaged enemies and hidden wall cracks |
| Pacing | Gradual transition from safe hubs to hazardous dungeons | Smooth difficulty curve suitable for both newcomers and veterans |
| Progression | Ability unlocking through environmental exploration | Encourages organic backtracking to previously impassable rooms |
| Map Design | Interconnected labyrinth with shortcut gates | Rewarding routing that minimizes tedious transit time |
Meet Glimmer and the Cast of the Kingdom's Underbelly
While the decaying underground world is dangerous, it is far from deserted. The narrative charm of the experience comes alive through its quirky, expressive inhabitants. Every survivor scraping by in the kingdom's underbelly has their own distinct personality and motives.
Glimmer’s personal quest serves as the emotional anchor. After a deranged hunter kidnaps Glimmer's sheltered siblings in the dead of night, our tiny protagonist must summon incredible courage to descend into the ruins. To save his flock, Glimmer must ultimately confront the wicked queen seated high above in her secluded quarters.
Along the way, you meet companions who add warmth to the bleak environment. You can sit down and share a campfire with Ilda, an anxious yet resourceful mouse fleeing the queen’s ruthless royal guard. Later, you cross paths with Looter, an eccentric scavenger who combs crumbling ramparts in search of forgotten treasures and rare wares. These interactions provide vital clues about the kingdom's history, alongside temporary refuge between difficult combat gauntlets.
| Character | Role / Archetype | Gameplay Significance |
|---|---|---|
| Glimmer | Main Protagonist | Agile bird wielding a lit matchstick; delivers fast melee combos and aerial dashes |
| Ilda | Wandering Mouse Ally | Offers campfire rest sites, hints regarding nearby perils, and world lore |
| Looter | Scavenger & Merchant | Trades valuable trinkets and consumables in exchange for subterranean relics |
| The Hunter | Primary Antagonist (Early Game) | Serves as the catalyst for Glimmer’s journey; drives the sibling rescue questline |
| The Wicked Queen | Overarching Tyrant | The ruler corrupting the realm; dictates the ultimate objective of the entire campaign |
Mastering Matchstick Combat and Trinket Customization
Combat in this adventure is fast, rhythmic, and precision-oriented. Because Glimmer is diminutive compared to the towering beasts dwelling in the dark, careless button-mashing will quickly lead to defeat. Your primary weapon—a burning matchstick—functions as both an offensive blade and a defensive beacon.
Striking enemies with your matchstick deals direct physical and fire-element damage. However, keeping the flame lit requires careful management during extended encounters. Striking foes or igniting wall sconces helps sustain your illumination, ensuring you never end up fighting in total darkness.
As you navigate the subterranean halls in the welldweller demo, you will discover your first selection of equippable trinkets. The trinket system operates on a flexible badge or slot framework, allowing you to tailor Glimmer’s combat performance to your preferred playstyle. Whether you favor defensive recovery, rapid aerial slashes, or critical hit bursts, combining the right trinkets dramatically tilts the odds in your favor.
| Trinket Focus | Primary Advantage | Best Suited For |
|---|---|---|
| Ember Striker | Boosts weapon reach and adds lingering burn damage | Players who prefer hit-and-run tactics against large foes |
| Featherweight Dash | Grants additional invulnerability frames during evasive maneuvers | Fast-paced boss fights with chaotic projectile patterns |
| Kindled Hearth | Accelerates passive healing recovery when resting at bonfires | Beginners navigating lengthy platforming sections |
| Looter's Magnet | Automatically pulls dropped currency and shards toward Glimmer | Efficient resource farming when upgrading gear |
| Quick Sparks | Increases basic attack swing speed by a flat percentage | Aggressive melee builds focusing on high burst damage |
To maximize your combat efficiency during your playthrough, keep the following core tactical tips in mind:
- Watch Enemy Tell Animations: Subterranean beasts telegraph their lunges with glowing eyes or subtle posture shifts. Evade backward before stepping in for a quick three-hit combo.
- Utilize Downward Aerial Slashes: You can pogo off specific enemy heads and environmental hazards to reset your jump, keeping Glimmer safely out of reach of sweeping ground attacks.
- Prioritize Target Elimination: When swarmed by flying pests and armored ground creepers, eliminate flying targets first to clear your airspace.
- Ignite Static Sconces Immediately: Entering a new combat arena can be disorienting. Striking static wall torches provides permanent ambient lighting, preventing sudden ambushes.
Environmental Hazards and Puzzle Mechanics
Combat is only half the battle. The sunken kingdom is packed with ancient mechanical traps, overgrown flora, and environmental puzzles that require sharp observation. Because the world has decayed over centuries, unstable masonry and toxic waters pose constant threats to an adventurous little bird.
Navigating these challenges requires utilizing Glimmer’s matchstick in inventive ways. Aside from lighting dark hallways, flame can ignite explosive briars, burn away spiderwebs blocking narrow crevices, and melt frozen mechanism switches.
Community reports highlight that the puzzle design emphasizes fluid movement rather than sluggish trial-and-error. For instance, some puzzles require you to carry a timed flame charge across delicate platforms before the spark extinguishes, opening locked doors leading to hidden sibling cages.
| Hazard / Obstacle | Behavior | Countermeasure / Solution |
|---|---|---|
| Rotting Brambles | Blocks pathways; damages Glimmer on contact | Ignite using a heavy matchstick slash to clear the passage |
| Deep Mire Pools | Slows movement speed and disables ground dashing | Hop across floating debris or use wall clings to stay elevated |
| Collapsing Flagstones | Crumbles 1.5 seconds after being stepped on | Cross swiftly without hesitating; avoid jumping backward onto cracked stone |
| Shadow Lurkers | Invulnerable entities cloaked in deep shadow | Drive them back by illuminating nearby floor beacons or throwing sparks |
| Spike Gauntlets | Stationary hazards lining narrow shafts | Chain wall jumps with precise dash cancels to slip through gaps |
Boss Encounters: Strategies for Victory
The climax of any great Metroidvania lies in its boss design, and the encounters showcased in the early build set a thrilling standard. These confrontations test everything you have learned regarding evasion, flame maintenance, and attack positioning.
Bosses in this realm do not just possess large health bars; they actively manipulate the battlefield. Certain bosses will extinguish room lighting during phase transitions, forcing you to rely on audio cues and glowing attack indicators to dodge devastating sweeps.
To learn more about the title's overarching release roadmap and artistic direction, check out Top Hat Studios' official WellDweller portal for detailed media showcases and updates directly from the production team.
Before stepping into a boss arena, inspect your current setup. Equipping mobility-focused trinkets will make evading screen-filling attacks significantly easier. If a boss pins you against an arena wall, remember that your dash provides invulnerability frames—allowing you to slip clean through the boss’s hitbox without taking damage.
System Requirements and Recommended Settings
Because the game utilizes a clean, hand-crafted 2D visual style, it runs smoothly across a broad spectrum of hardware configurations. Even modest setups, handheld gaming PCs, and ultrabooks can achieve stable framerates with minimal tweaking.
For the most responsive experience, playing with a dedicated gamepad is strongly recommended. Precision platforming and directional downward slashes feel natural on analog sticks or responsive D-pads.
| Hardware Component | Minimum Target (1080p, 60 FPS) | Recommended Target (1440p / 4K, 60+ FPS) |
|---|---|---|
| Operating System | Windows 10 (64-bit) | Windows 11 (64-bit) |
| Processor | Dual Core 2.4 GHz | Quad Core 3.0 GHz or higher |
| Memory (RAM) | 4 GB | 8 GB |
| Graphics (GPU) | Integrated Graphics (Intel HD 520 or equivalent) | Dedicated GPU (GTX 1050 / Radeon RX 560 or better) |
| Storage | 2 GB available space | 2 GB available space (SSD recommended) |
| Input Device | Keyboard & Mouse supported | XInput or DirectInput compatible controller |
Exploration Checklist: Finding Every Secret
Completing the early content is straightforward if you run in a straight line, but doing so means missing out on vital upgrades. The subterranean world hides valuable collectibles that increase Glimmer's overall survivability and utility.
When you download and dive into the welldweller demo, take your time surveying every single room on your minimap before advancing toward the main story markers.
- Check Map Discrepancies: If your map grid shows an open border along a corridor wall, strike the surface with your matchstick to uncover breakable false walls.
- Locate Sheltered Siblings: Finding Glimmer's lost siblings tucked away in hidden nests rewards you with permanent heart fragments and extra trinket slots.
- Hoard Ancient Shards: Collect every dropped currency crystal from fallen enemies; buying items from Looter early makes subsequent zones considerably easier.
- Mark Inaccessible Ledges: If you spot an enticing treasure chest resting on a high ledge that is impossible to reach with your starting jump, take mental note to return once you unlock vertical mobility abilities.
Experiencing the welldweller demo firsthand confirms that the upcoming adventure has all the hallmarks of an indie classic: tight controls, a haunting fairy-tale world, memorable character interactions, and deeply rewarding exploration. Make sure to wishlist the game and test out the preview build to prepare for Glimmer's full quest against the wicked queen.
Frequently Asked Questions
How long does it take to beat the Welldweller demo?
Most players can complete the main story route of the welldweller demo in approximately 45 to 75 minutes. However, if you take the time to hunt down every hidden sibling, locate secret breakable walls, and purchase all available trinkets from Looter, a thorough playthrough will take closer to 90 to 120 minutes.
Does progress from the demo carry over to the full game?
Save data continuity depends on the final build architecture closer to launch. In many developer demos featuring non-linear progression, early save files may not carry over directly due to balancing adjustments and room layout revisions in the release version. However, testing the demo gives you a major head start in mastering movement and combat mechanics.
Where can I play or download the Welldweller demo?
The preview build is made available across digital storefronts, primarily on Steam during seasonal indie celebrations and publisher showcases. Keep an eye on official announcements from Top Hat Studios and the development team to catch the latest downloadable builds and testing windows.
What makes the game's matchstick mechanic unique?
Unlike standard melee weapons in Metroidvania games, Glimmer's matchstick serves dual purposes: offensive combat and environmental survival. It dynamically lights up dark rooms, exposes camouflaged enemies, burns through barricades, and melts frozen mechanisms, making illumination a core pillar of both puzzle-solving and combat positioning.
Related Guides
Essential WellDweller Tips: Complete Beginner and Exploration Guide
Master Glimmer's journey with the best WellDweller tips. Learn matchstick combat, map navigation, trinket builds, and boss strategies.
The Ultimate WellDweller Guide: Combat, Trinkets, and Exploration Tips
Master the dark fairy-tale metroidvania with our comprehensive WellDweller guide. Learn matchstick combat, trinket builds, NPC quests, and boss tactics.
Welldweller Beginner Guide: Essential Tips to Master Traversal and Combat
Master the dark fairy-tale metroidvania with our comprehensive Welldweller beginner guide. Learn matchstick movement, combat tips, and survival tactics.
Welldweller Walkthrough: Complete Guide to the Rotted Kingdom
Master every puzzle, boss fight, and sibling rescue with our complete Welldweller walkthrough for Glimmer's dark fairy-tale metroidvania quest.